Rack19 Installation Guide
Thank you for purchasing Rack19 by Neven Cycles. Rack19 is a new take on the concept of how we store our bicycles. Enabling you to store your bike off the floor and on any wall.
With the Rack19 design your bicycle is kept at a tilted angle, freeing up space below your bike. Rack19 can also be used to keep your bike secure, allowing you to lock your bike to the rack.
Below are the installation instructions for your Rack19. You can also download a printable version of the instructions here for your convenience.
Rack19 Assembly Components
What’s In The Box?
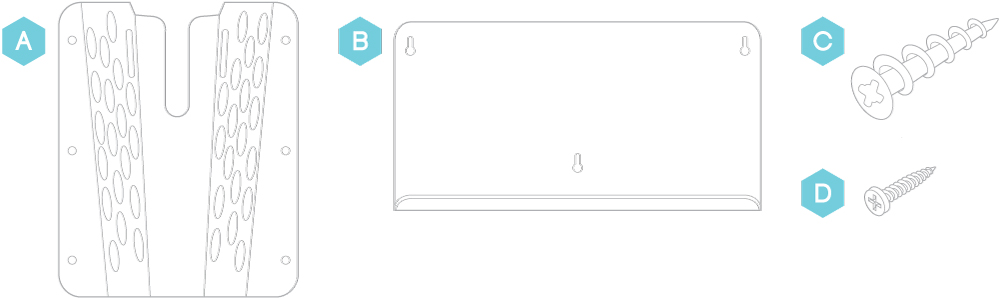
A) Rack19 Crank Holder (x1)
B) Wheel Rests (x2)
C) Lags (x15)
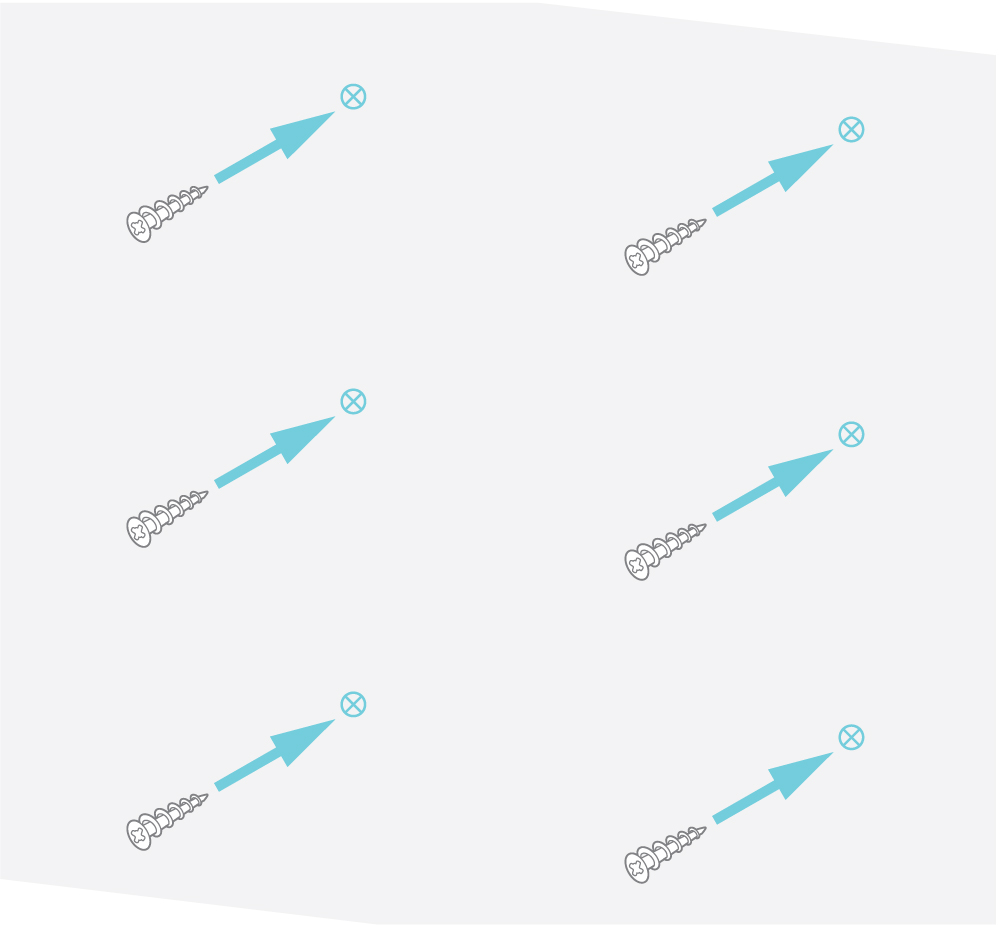
D) Screws (x15)
What You’ll Need
1) Cordless Drill with Philips Head Screw Attachment
2) Tape Measure
3) Pencil or Other Marking Tool
Important Note:
If you have masonry walls you will need to use different fasteners (such as hollow wall anchor)
STEP 1: Decide Where To Place Your Rack19
From the ground, measure along the wall at which height you would like your Rack19 to be installed. Make a light pencil mark at this height, this will be where the wheels of your bike will rest.
Factors to keep in mind when your deciding on the height of your Rack19 include:
1. At what height do you feel comfortable lifting your bike down from?
2. Make sure there is headroom in order to lift the bike out without hitting anything.
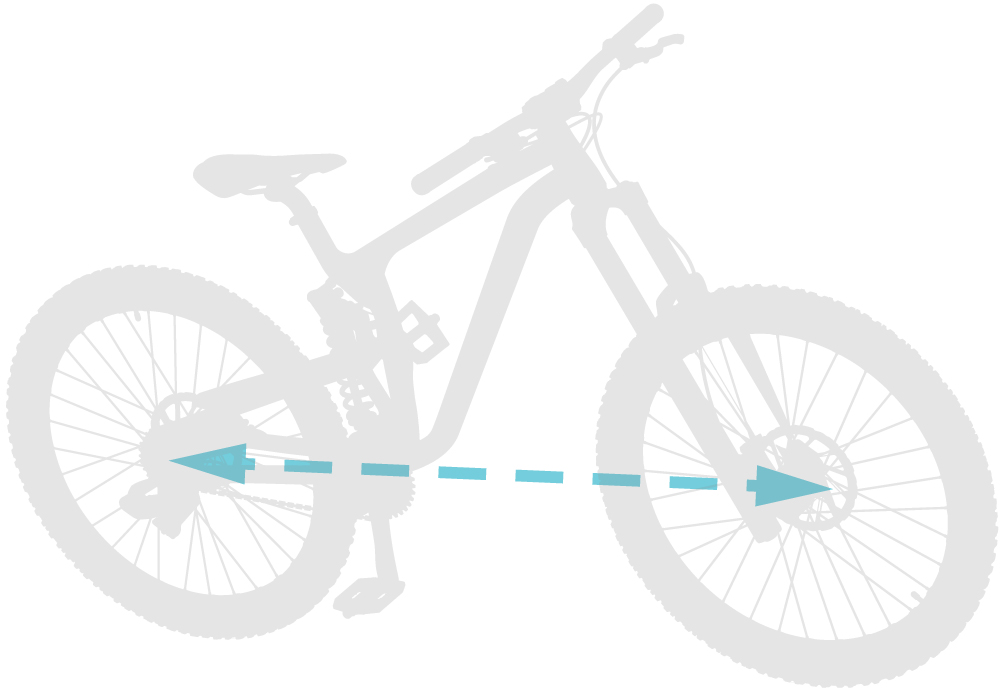
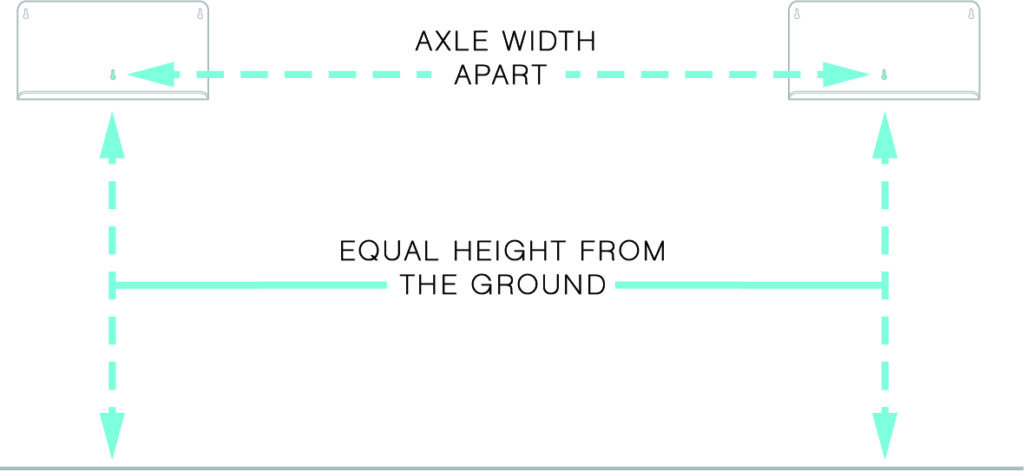
STEP 2: Measure The Distance Between The Two Axles On Your Bike
This measurement will indicate how far apart the (B) Wheel Rests will need to be placed from each other on the wall.
STEP 3: Place Wheel Rest #1
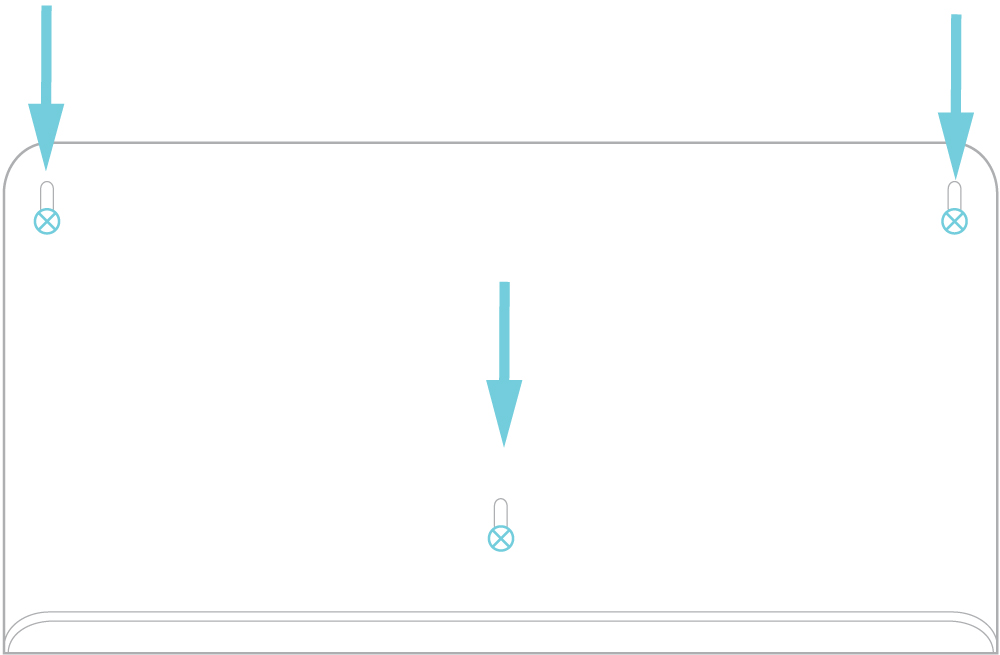
Hold the 1st (B) Wheel Rest to the height mark, made in Step 1, and make three more light pencil marks through the holes for each of the Wheel Rest’s three screw locations.
STEP 4: Install Wheel Rest #1, Part A
Place a (C) Lag onto the head of your drill attachment and install a lag into each of the three points marked on the wall (Step 3).
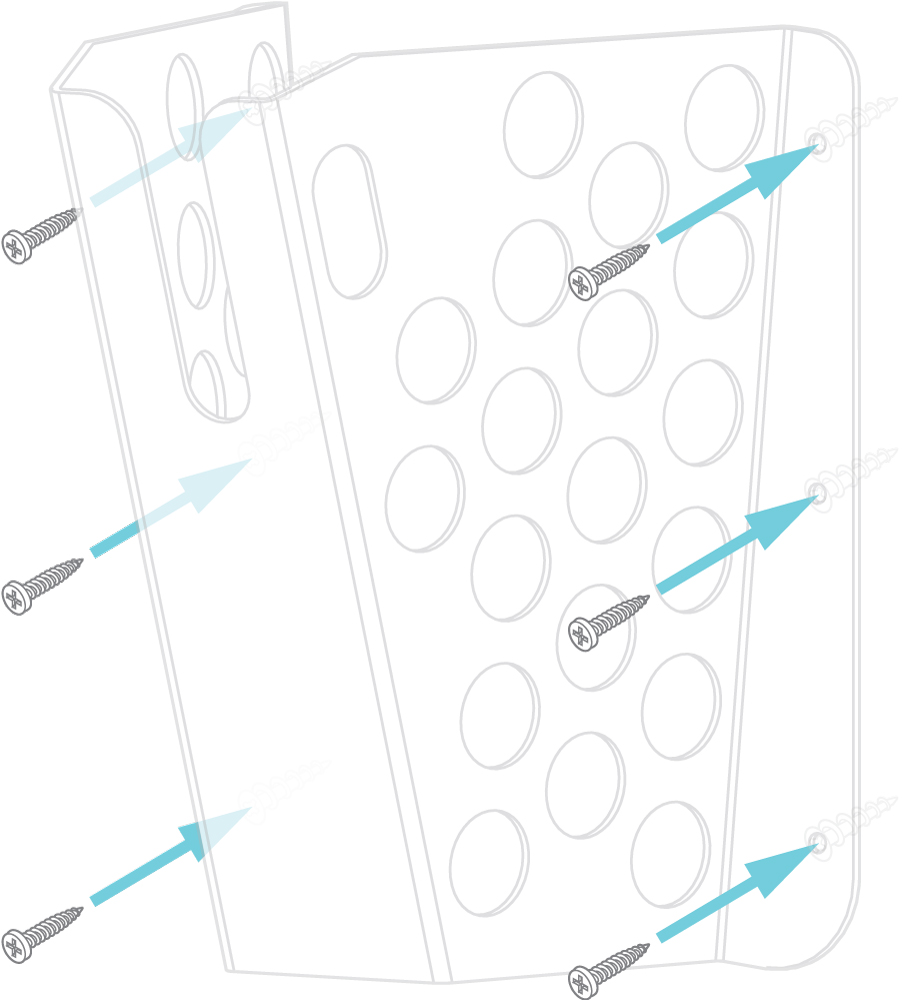
STEP 5: Install Wheel Rest #1, Part B
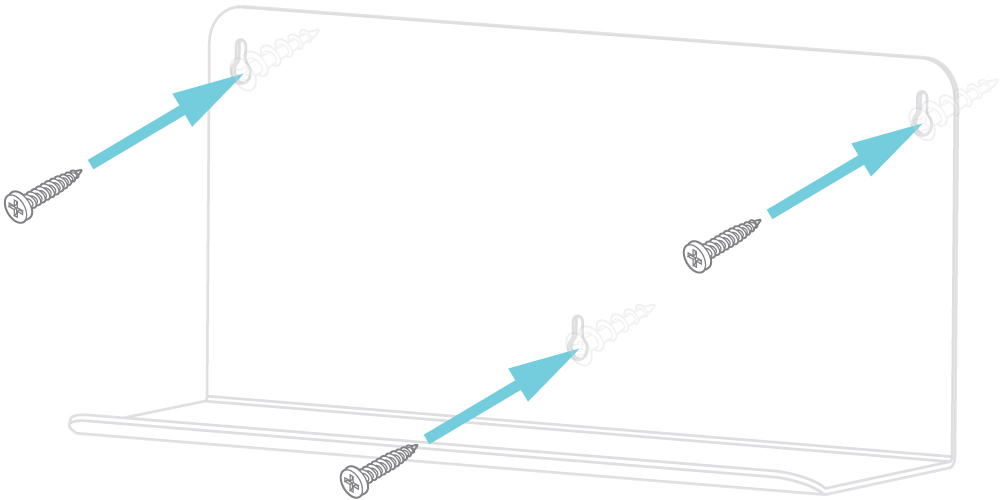
Place the (B) Wheel Rest back against the wall and affix in place by driving three of the (D) Screws through the (B) Wheel Rest’s mounting holes and into each of the installed lags.
STEP 6: Locate Wheel Rest #2
The (B) Wheel Rest #2 needs to be placed axle width from Wheel Rest #1 (measurement from Step 2)
Make sure Wheel Rest #2 is equal distance from the ground as Wheel Rest #1.
Measuring along the wall, measure from the middle mounting point on Wheel Rest #1. With a pencil, lightly mark this distance on the wall, this will be the placement of the middle mounting point of Wheel Rest #2.
STEP 7: Install Wheel Rest #2
As in Step 3, hold (B) Wheel Rest #2 against the wall, lining up the middle mounting point with the mark made on the wall. Proceed to make marks for the two other mounting points. Repeat Steps 4 and 5 to install (B) Wheel Rest #2.
STEP 8: Place The Crank Holder, Part A
Hold your bike against the wall; resting the wheels of the bike on the two (B) Wheel Rests.
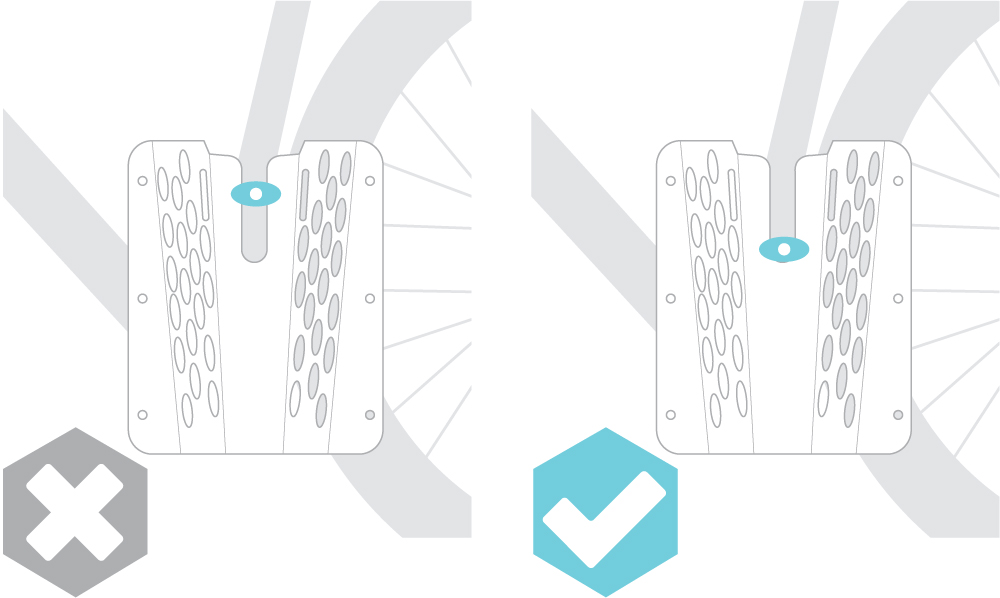
Adjust the crank of your bike so the crank is vertically straight and the inner pedal is at a 12 o’clock position.
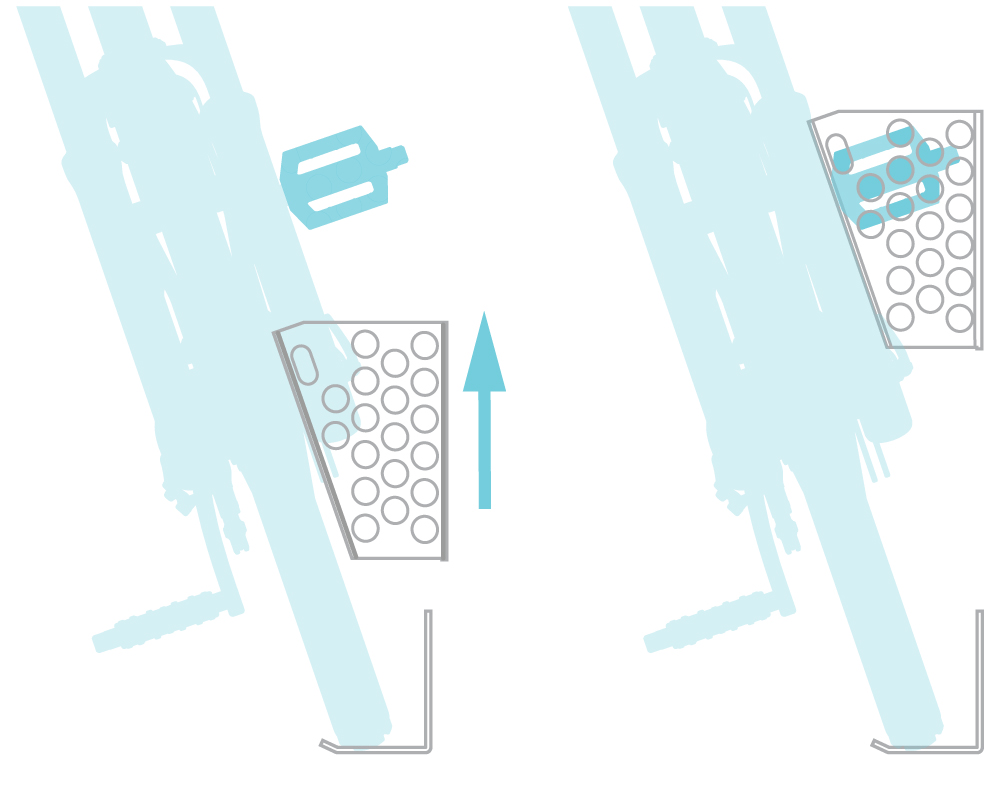
While still holding your bike on the wall, slide the (A) Crank Holder up and onto the inner crank. Making sure to leave wiggle room.
STEP 9: Place The Crank Holder, Part B
Hold your (A) Crank Holder on the wall at its position from Step 8 and lightly mark, with a pencil, the 6 mounting points.
Once you mark these points you may remove your bike and the (A) Crank Holder from the wall and place them both to the side.
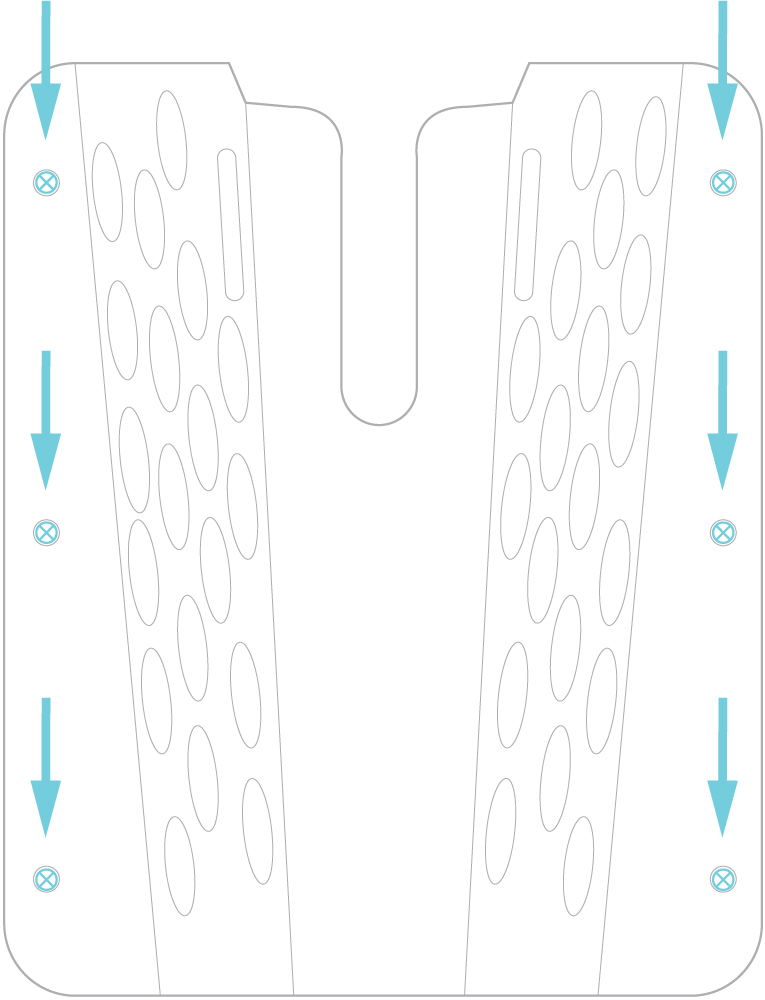
STEP 10: Install Crank Holder, Part A
With the (A) Crank Holder removed from the wall, Drill the remaining six (C) Lags into the marked points (made in Step 9) into the wall.
STEP 11: Install Crank Holder, Part B
Place the (A) Crank Holder back against the wall and affix in place by driving six of the (D) Screws through the (A) Crank Holder’s mounting holes and into each of the installed lags.
SPECIAL INSTRUCTIONS FOR ROAD BIKES
Many road bike pedals have a large platform that can be held in place on the(A) Crank Holder. If you have speedplay pedals, you can still mount your bike with your Rack19. However, please pay extra attention to when locating the (A) Crank Holder.
With speedplay pedals (www.speedplay.com) you will want the spindle of the pedal to rest directly on the (A) Crank Holder at the base of the V-groove.